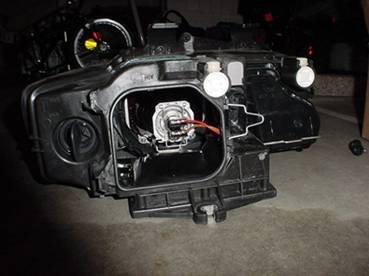
1) Unplug and remove headlight
assembly. There are four Torx screws holding the assembly in place (2 on
top and 2 at the base of the assembly)
2) Remove the stock H7 halogen filament from its place.
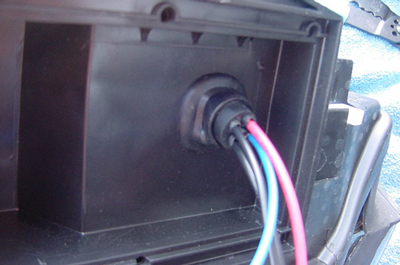
3) With an utility knife or dremel, cut a
section of the bottom side of the housing out, to accommodate for the incoming
wires and rubber grommet. Be mindful of the grommet size before
cutting. If you use a dremel, tape off the interior of the light housing
to prevent plastic shavings from entering.
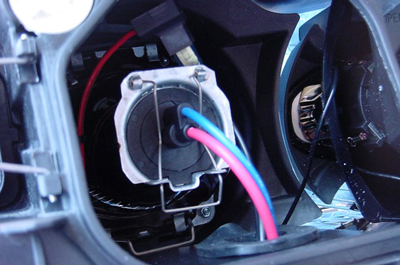
4) Once entry whole is made, run the wires
through using the grommet to seal the open area and plug in the Xenon Bulb. BE
SURE TO HANDLE THE BULB BY THE BASE AND NOT THE GLASS. Handling the bulb by
the glass my cause the bulb to explode due to the native oils on your skin.
5) THE POSITIVE (+) AND NEGATIVE (-) TERMINALS SHOULD ALWAYS
BE TESTED WITH AN OHM METER BEFORE USING TO ENSURE THE PROPER CONNECTION IS
MADE.
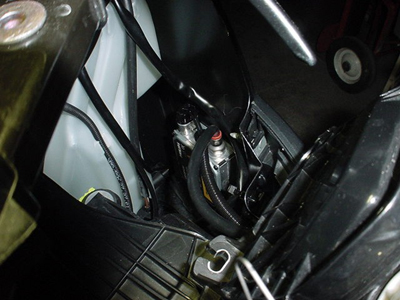
6) Mount the igniter using the provided Velcro,
we choose to hide/mount the igniter on the inside of the fender in order to
retain a stock look. Do not place the ballast in an area where it will be
exposed to high levels of water or splashes from the front of the car.
7) Position the light housing half way in and plug the
bulb wires to the igniter. Now put the housing all the way back in and
reinstall the torx bolts.
VOILA! You can
see the result below...
Pictures & Text by Anonymous Contributor
:: Installed 7000K HID H7 KIT on Audi A4
Click on the thumbnails for a larger image.
Please contact us and find out more about our products and services info@xenonvalot.com
DISCLAIMER
WARNING
ALL INFORMATION CONTAINED ON THIS SITE IS PROVIDED WITHOUT
RESPONSIBILITY ON THE PART OF XENONVALOT.COM OR ANY ASSOCIATED
OR RELATED PARTIES OR LOCAL OPERATORS OR ANY CONTRIBUTING PERSON
OR ORGANISATION AND TO THE FULL EXTENT PERMISSIBLE BY LAW, XENONVALOT.COM
ACCEPTS NO LIABILITY FOR ANY LOSS, DAMAGE OR INJURY ARISING AS A RESULT
OF ANY RELIANCE ON THE ADVICE AND INFORMATION SET OUT ON THE SITE OR
ARISING IN CONNECTION WITH ANY DIY PROJECTS.
Safety instructions provided with tools,
products or materials used in carrying out the DIY Projects
should be read and followed carefully at all times.
Any information or advice given on this site is meant for guidance purposes only
and you are responsible for determining whether such information or advice applies
to your particular situation. The information and advice should not be relied upon
as statements or representations of facts. No warranty is given as to the accuracy
of any information given.
Any information on this site is not meant to be comprehensive and if you are
inexperienced in carrying out DIY Projects or unsure of your abilities, you
should always seek expert advice and assistance. You are personally fully
responsible for the safety of your equipment and work environment and that
you are of a sufficient level of skill for the work involved.